Guest List Manager
How to create and manager your event guest list
Whether you’re planning a small private gathering with friends or organising your dream wedding with hundreds of guests, Envitely makes it easy to plan, organise, streamline workflows, and achieve your event planning goals. In this article, you’ll learn how to navigate and manage the Envitely guest list module, making the most of our features and tools.
Get started with a free Envitely subscription today
1. Guest list module elements
Before starting your guest list, let’s begin by familiarising yourself with the user interface.
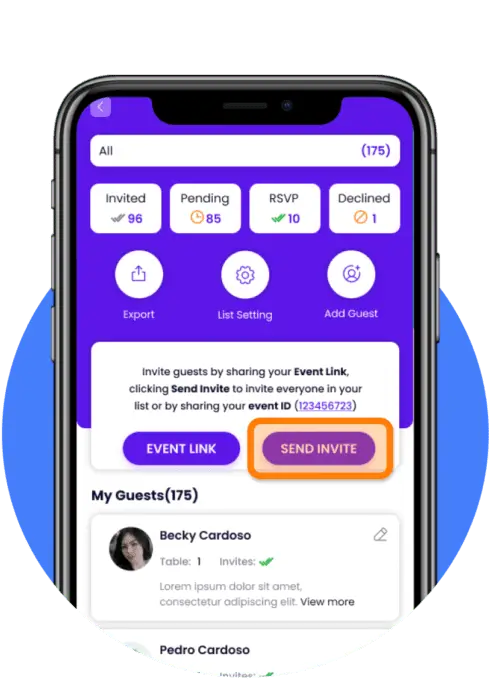
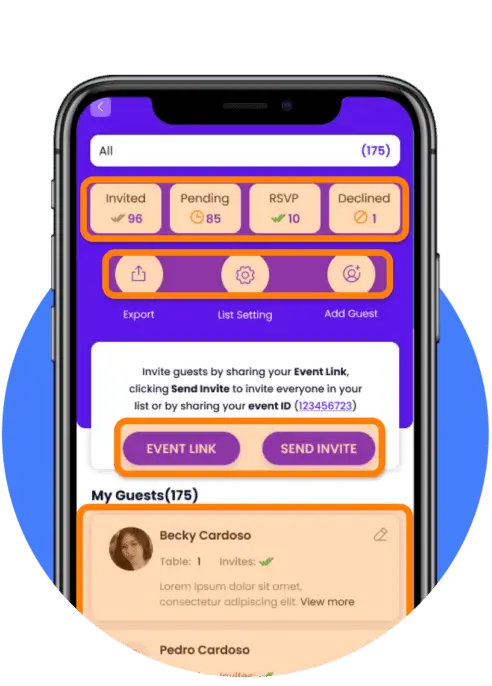
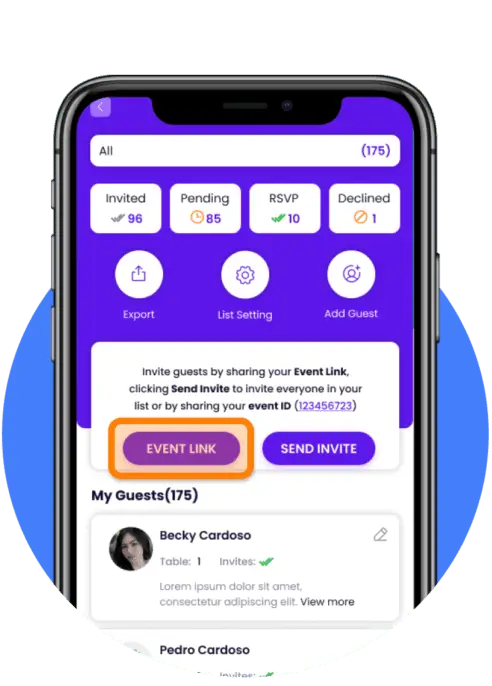
- At the top of the screen, you’ll notice four content blocks. These are designed to give you an overview of the status of your invitations.
- Below this, you’ll find three circular buttons. These buttons allow you to export your guest list, edit your guest list settings, and add guests to your invite list.
- Next, you’ll see two buttons. The first button labelled “Share Link” allows you to send a single event link to individuals to register or join your event. The second button labelled “Send Invite” will email an invitation to your entire guest list (where an email or phone number has been provided). If you add more guests to your list, you can click the “Send Invite” button again, and we’ll ensure that only new guests receive the invite.
- Lastly, you’ll find your guest list. Here you can see who is on your list, edit their details, or remove them entirely from your event
2. Guestlist setting
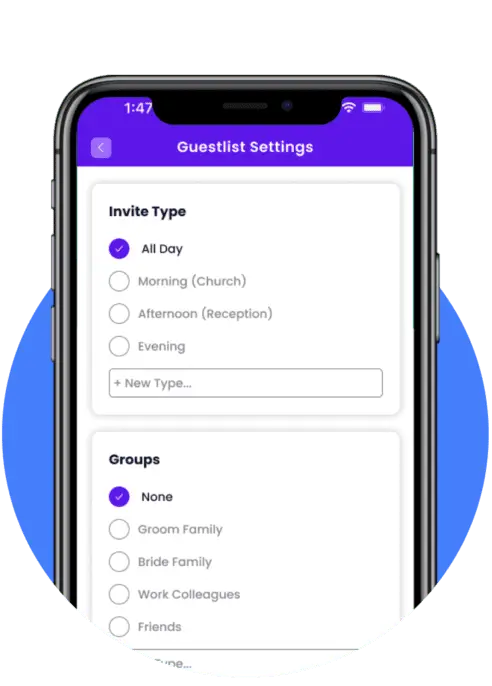
Before adding guests to your event, check and update your guest list settings to ensure important elements of your event are set and can be assigned to your guests.
Consider these three elements:
- Invite Type: An event may comprise of several functions. For example, a wedding may have a church service, reception, and dinner and you may want to only invite certain guests to some these functions. By creating invite types you can choose who attends which function.
- Groups: Guest list groups are a perfect way to manage guest allocations. You might have groups like Friends, Family, Colleagues, or specific departments if you’re organising a work event. There are no limits or restrictions on the type or number of groups you can have.
- Seating Plan: A seating plan is crucial for many events. Click the “Add Table” button to add a table name or number and specify how many people you can assign to a table. By setting a seating capacity for each table, we’ll ensure you do not exceed the table’s limit.
3. Add guest
There are several ways to add guests to your event.
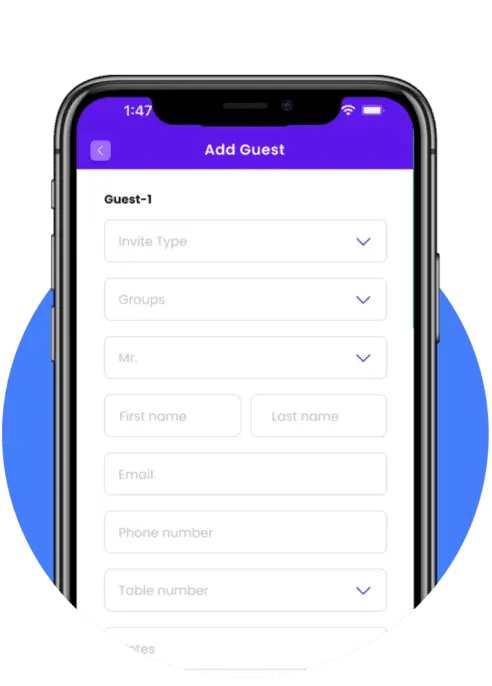
Click the “Add Guest” button to open the pop-up menu where you can choose to add guests manually or in bulk.
Manual Guest Entry:
- Fill in your guest’s details.
- Assign an invite type, group, and table if you are ready to do so; otherwise, you can edit this later.
- Note that if you want your guests to access the Envitely event on their devices, you need to provide an email address or phone number. This will allow them to RSVP, and we can track their responses.
- Add one or more companions with your primary guest. This will group the guests together.
- Lastly, save the guest or click “Add Another” to add a new guest.
Bulk Guest Entry:
There are two ways to add guests in bulk:
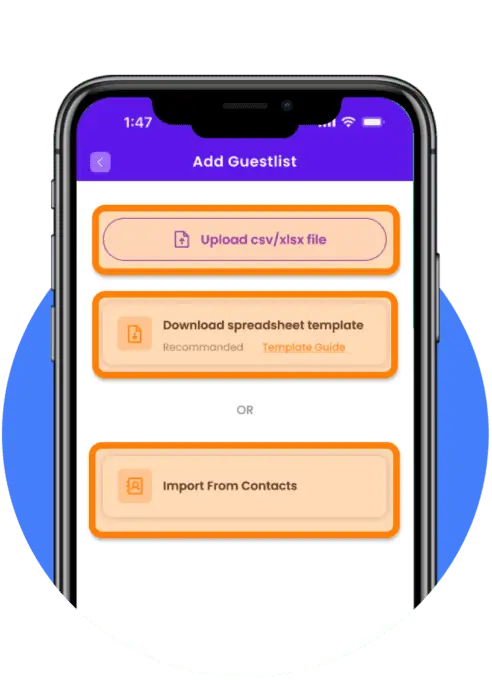
- Upload CSV or XLSX file: Download the bulk upload template (you can populate the document on your PC and then upload it from your phone). Use the template guide to help you complete the necessary fields.
- Import from your phone: Click the “Import” button to access your contacts. Check the names you want to add to your guest list.
In both cases, once you import the data, your imported list will be displayed. Here, you can add or edit guest information, assign invite types, groups, and tables, and add companions.
Lastly, save your list and return to the home screen to see your full guest list.
4. Share event link
The “Event Link” button serves two functions:
- RSVP for Invited Guests: You can send the event link to individuals on your guest list. They can use the link to access the event in the Envitely app and RSVP
- Self-Registration for Public Events: For public events, which are open to anyone with the link, you can share the event link to allow people to self-register. When someone registers for your event, their details will appear in your guest list. You can review the list, edit their information, or remove them entirely.
5. Send invitation
Once you are satisfied with your guest list, click the “Send Invitation” button. This will send an email to all your guests, provided you have entered these details.
The invitation will prompt your guests to download the Envitely app, access the event you created, and RSVP. All responses will be tracked and updated in the guest list module.
If you need to add more guests after sending the initial invites, simply click the “Send Invitation” button again. Only guests who have not previously logged into your event will receive the invite.
If, for any reason, the link does not work or the user cannot access the event in the Envitely app, you can send them the event ID, which can be added in the “Join Event” module. Ensure the user is on your guest list; otherwise, they may not be able to join the event, even with the event ID.
