Venue Manager
How to manager your venue shortlist and confirm your event venue
Whether you’re planning an intimate gathering with friends or organising your dream wedding with hundreds of guests, Envitely simplifies the process. Our platform helps you plan, organise, streamline workflows, and achieve your event planning goals. In this article, you’ll discover how to navigate the Envitely Venue Manager and make the most of our features and tools.
Get started with a free Envitely subscription today
1. Shortlist
Selecting the right venue is crucial for the success of an event. It impacts nearly every aspect of event planning, from budgeting and logistics to guest experience and overall ambiance. A well-chosen venue aligns with the event’s goals and needs, ensuring that all other elements come together smoothly.
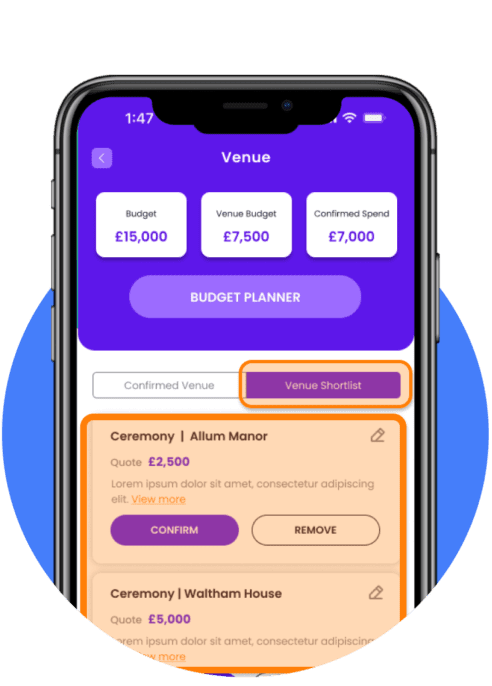
To assist you in finding the perfect venue, we have designed the Venue Manager module to help you create a shortlist of potential venues before making your final selection.
There are no limits to the number of venues you can add to your shortlist. Simply click the “Add Venue” button to open the Add Venue window and fill in the required details.
Required fields:
- Venue Category/Function: Some events may require multiple venues. Specify the function of each venue to inform your guests about what they are attending, such as a reception or conference.
- Venue Name: This will be displayed on the event details page.
- Quote: If you have received a price quote for the venue, record it here for reference.
- Web URL: Add the website link if available.
- Address: This will be displayed on the event details page and linked to a map to help guests find directions.
- Description: (Optional) Add a description or notes to consider before making your final venue selection.
- Event Date and Time: This field is not required until after confirming a venue. It is especially important if the event includes multiple elements and venues at different times. This way, your venues will be displayed in chronological order in the event details section.

2. Confirm
To confirm venues, you have two options:
Select from Shortlist: Review your shortlisted venues and confirm your preferred choice(s). The selected venue(s) will automatically move to the Confirmed tab.
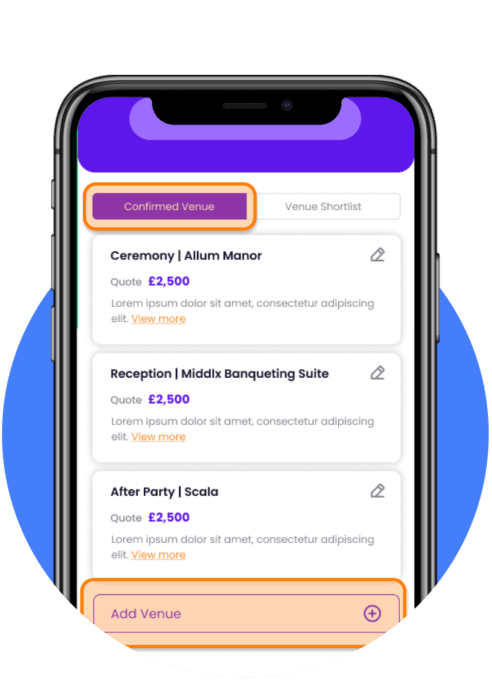
Add Venue: If you already have a specific venue in mind and don’t need to shortlist it, click the “Add Venue” button and fill in the required fields.
Once you’ve selected a venue, make sure to confirm the date and start time. If your event includes multiple venues, we recommend adding end times to indicate when one venue’s activities conclude and the next begins.
Please note that the information in the Confirmed tab will be displayed on the event details page for your guests. If you need to update venue information, click the pencil icon on the selected venue and save the changes. The updated details will be immediately reflected in your event information.

Download the Envitely app today and try our demo event for yourself
Take control of your next event
Download Envitely for free and start planning and managing your next event. Upon registration, you’ll be invited to trial our free demo event, allowing you to familiarise yourself with our tool before creating your own event.